> For the complete documentation index, see [llms.txt](https://handbook.proanimal.org/llms.txt). Markdown versions of documentation pages are available by appending `.md` to page URLs; this page is available as [Markdown](https://handbook.proanimal.org/for-organizers/campaign-guides/social-media-guide/technical-guide/creating-graphics.md).
# Creating Graphics
Canva is a graphic design tool that we use to create campaign graphics, including images for social media. We have a variety of templates that can be used in the creation of PAF posts!
## Getting Started with Canva
1. If you will be helping out with PAF social media posts and need access to our Canva account, please reach out to a PAF partner to grant you access.
2. Once you’ve been added to our team account, you’ll receive an email with login instructions.
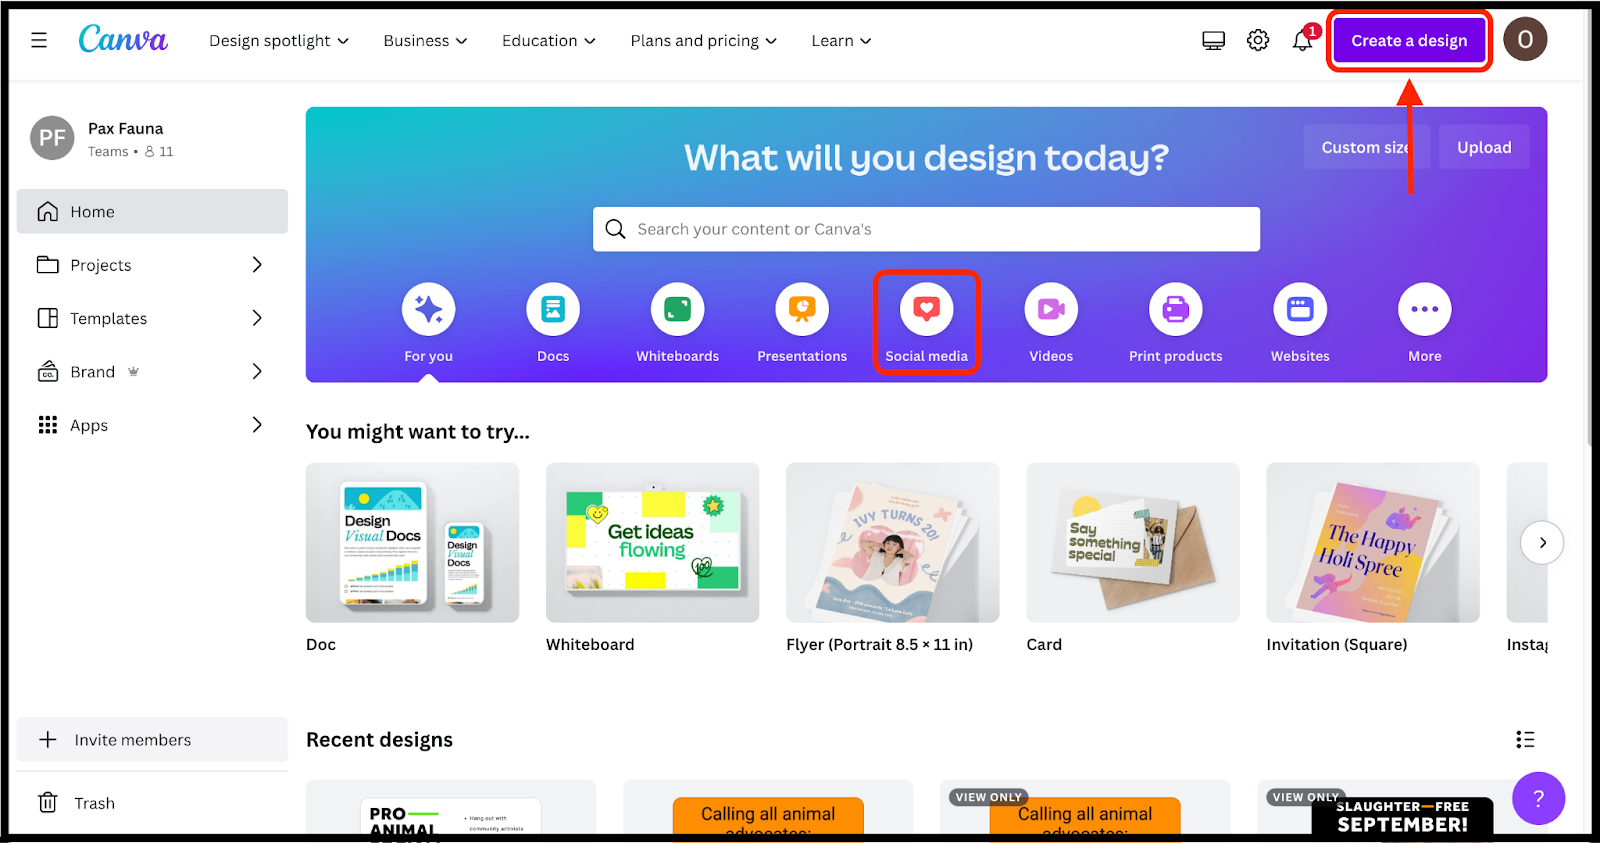
3. After following the prompts, you’ll reach the Canva home page. From here, you can:
* Review existing projects
* Create a design
* Search for content and templates
* Upload your own content
## Creating Social Media Graphics
This section provides guidance on how to create a social media graphic using Canva.
1. Get started creating your own graphic in Canva by selecting ‘Create a Design’ from the home page. *\*Note: You can also select the ‘Social Media’ template from the home screen to get started, then select the type of social media template.*
2. Select the type of graphic you are looking to create from the dropdown list.
* If you’re not sure what template to choose, it may be helpful to check out our quick reference guide on [Facebook & Instagram content types](/for-organizers/campaign-guides/social-media-guide/social-media-quick-reference-guide.md).
* *\*Note: If you are creating a graphic for both Facebook and Instagram, choose ‘Instagram Post (Square)’ as Instagram has stricter sizing requirements.*
3. After selecting your design type, a new page will open with your design. All of the design tools you’ll need can be found in the left-hand menu bar.
4. Select ‘Brand’ to find all of PAF’s brand-specific design elements. (\*Note: If it says ‘Pax Fauna brand kit’ below Brand Templates, make sure to toggle to ‘Pro-Animal Future’.)
* Under ‘Brand Templates’, you can select an existing PAF template to edit.
* You can also find PAF’s logos, color palette, as well as images, graphics and icons you can use in your design.
5. Drag and drop the desired design elements from the menu bar over to your design on the right.
* Resize and move your design around as needed.
6. Click on elements in your graphic to format them further. Use the menu that appears at the top of the screen for formatting.
* For text and graphics, select the color formatting tool to find PAF’s color palette. This will allow you to easily find and use PAF’s brand colors.
* Click “Position” to arrange layered text and images. Drag the layers in the order you want them in, with the first layer being the one in front.
7. Once finished, click the “Share” button in the top right, select the file type and size when prompted on the next screen, then click “Download”.
* *\*Note: PNG is the recommended file format.*
8. Your graphic is now saved in your downloads. You can upload it to social media from there!
---
# Agent Instructions
This documentation is published with GitBook. GitBook is the documentation platform designed so that both humans and AI agents can read, navigate, and reason over technical content effectively. Learn more at gitbook.com.
## Querying This Documentation
If you need additional information that is not directly available in this page, you can query the documentation dynamically by asking a question.
Perform an HTTP GET request on the current page URL with the `ask` query parameter, and the optional `goal` query parameter:
```
GET https://handbook.proanimal.org/for-organizers/campaign-guides/social-media-guide/technical-guide/creating-graphics.md?ask=&goal=
```
`ask` is the immediate question: it should be specific, self-contained, and written in natural language.
`goal` is optional and describes the broader end goal you are ultimately trying to accomplish on behalf of the user. GitBook uses it to tailor the answer towards what is most useful for that goal.
The response will contain a direct answer to the question and relevant excerpts and sources from the documentation.
Use this mechanism when the answer is not explicitly present in the current page, you need clarification or additional context, or you want to retrieve related documentation sections.